Quickstart
The Macrometa PhotonIQ Virtual Waiting Room service (VWRs) offers extensive features to manage high-traffic volumes on websites and applications during peak periods like discounts and holiday sales. By implementing VWRs for their websites, businesses can ensure server stability, thus preventing server overload and potential downtime, ensuring service availability and user satisfaction.
PhotonIQ offers two ways to create and use your website's virtual waiting room service.
- The VWRS GUI : A friendly, intuitive graphical user interface that allows you to configure, create, and manage your waiting room(s).
- The PhotonIQ Virtual Waiting Room API: A list of available APIs that allows you to create, update, modify, and delete your virtual waiting room, and retrieve vital waiting room metrics.
Let's create our first virtual waiting room service with the VWRs GUI to get started.
Objectives
This quickstart will guide you through:
- Creating and configuring your first VWR with the PhotonIQ VWRS GUI
- Configuring additional waiting room details
- Monitoring and observing the performance of the VWR
Creating your Virtual Waiting Room
Steps
To create a waiting room:
- Login to the VWRS GUI with your Macrometa credentials. Macrometa provides these credentials after you sign up for the service.
- Click Waiting Rooms from the top nav bar.
- Click New Waiting Room. This opens a pop-up section to enter the following details to set up your virtual waiting room.
waitingroom_name: The name of the waiting room. Names must not have spaces.
waitingroom_url: The URL that the waiting room needs to sit in front of. All subpaths of this URL are sent to this defined waiting room. For example,
/checkout/path1and/checkout/path2are both sent to the/checkoutwaiting roomaccess_type: The access type defines how the rate limit should be calculated. Different options include:
- users:
- The metric service counts the number of unique user requests every second. These are identified by a request ID stored in the encrypted cookie (vwrs-session).
- A rolling history of unique user requests is kept for 60 seconds.
- Rate Calculation Example: If the metric service indicates 480 unique users in the last 60 seconds, then the rate is 8 unique users per second.
- users_per_period:
- Behaves the same as the users access type, except the rate_limit is divided over the defined period.
- Rate Calculation Example: If the maximum rate is 100 for 5 seconds, then the rate is 20 users per second.
- rps:
- The metric service counts the number of requests to the origin server per second (RPS).
- Rate Calculation Example: If the maximum number of requests allowed is 20 and 13 POST requests are detected, then 7 more requests are released from the waiting room.
- users:
rate_period: Must be set if the access_type is users_per_period.
- Defines the time (in seconds) for rate calculation.
- Must be a number greater than zero.
rate_limit: The rate at which traffic should be diverted to the waiting room.
Must be a number greater than zero.
Note: For access_type of users and rps, this is the maximum request rate. For users_per_period, the maximum rate is calculated using the active rate divided by the period
max_origin_usage_time: The time (in seconds) that users can access the origin after being granted access. After this period, users are forwarded to the waiting room again.
waiting_room_interval: Defined in seconds, this interval determines how often the waiting room HTML page is updated with information like the request's position, estimated waiting time, and the maximum number of requests in the waiting room.
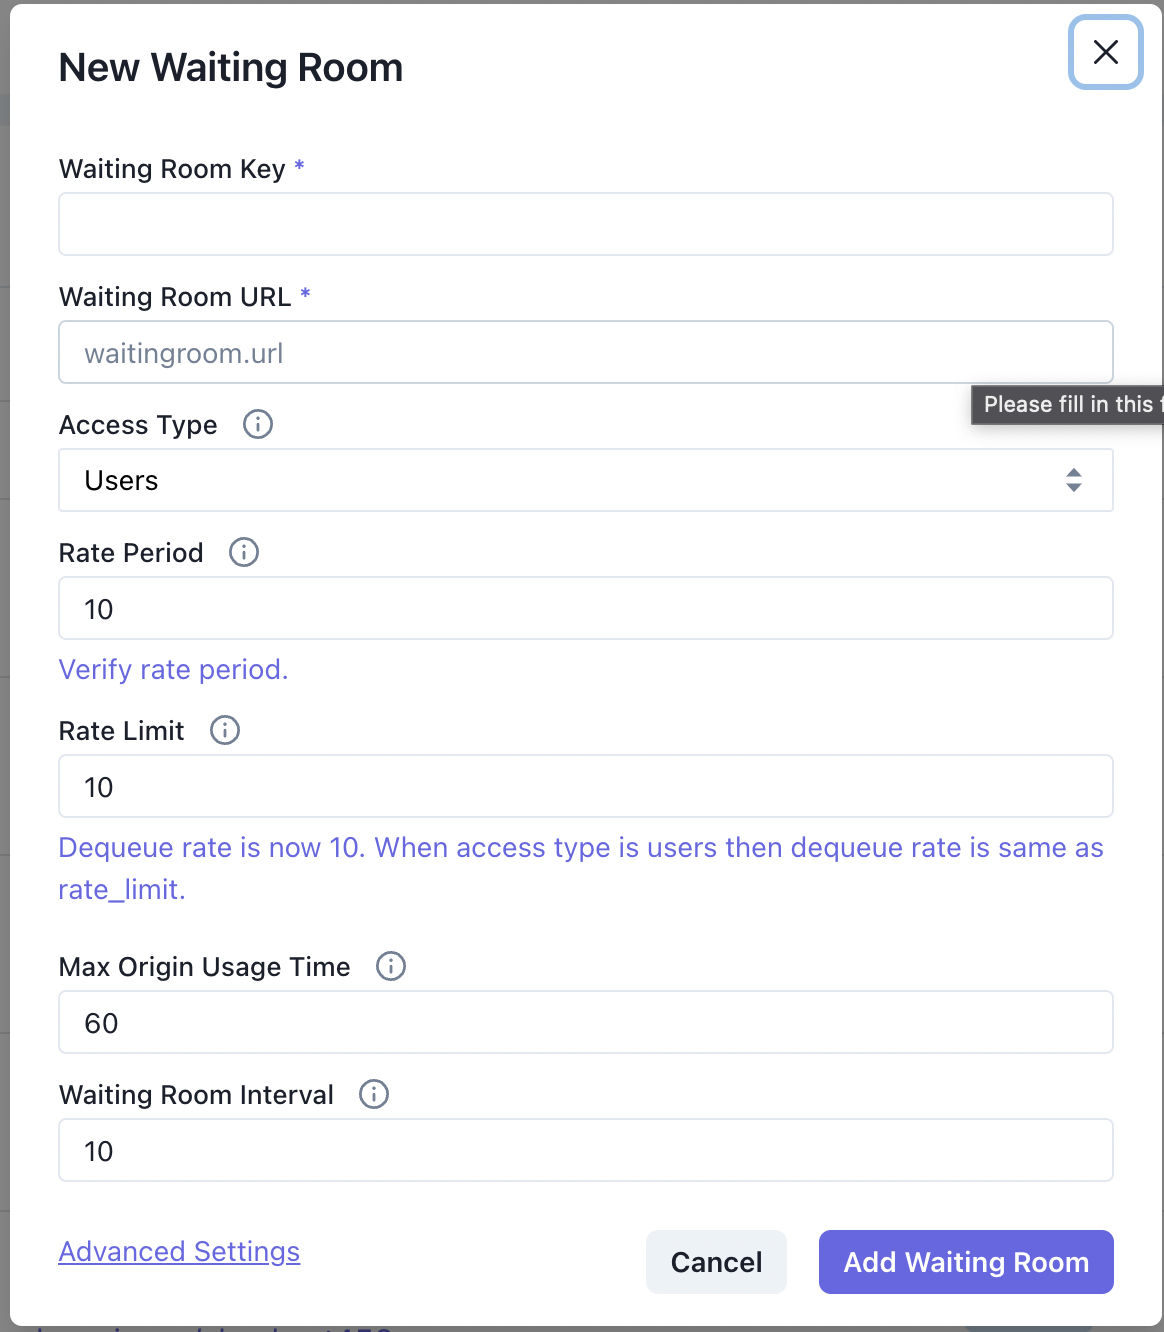
- Click Add Waiting Room
Configuring Additional Waiting Room Fields
The Virtual waiting room service allows you to further define and guide the behavior of your waiting room with its Advanced Settings fields. These fields include the queue type, dequeue mode, and others.
Click Advanced Settings from the waiting room definition page
Configure these additional details:
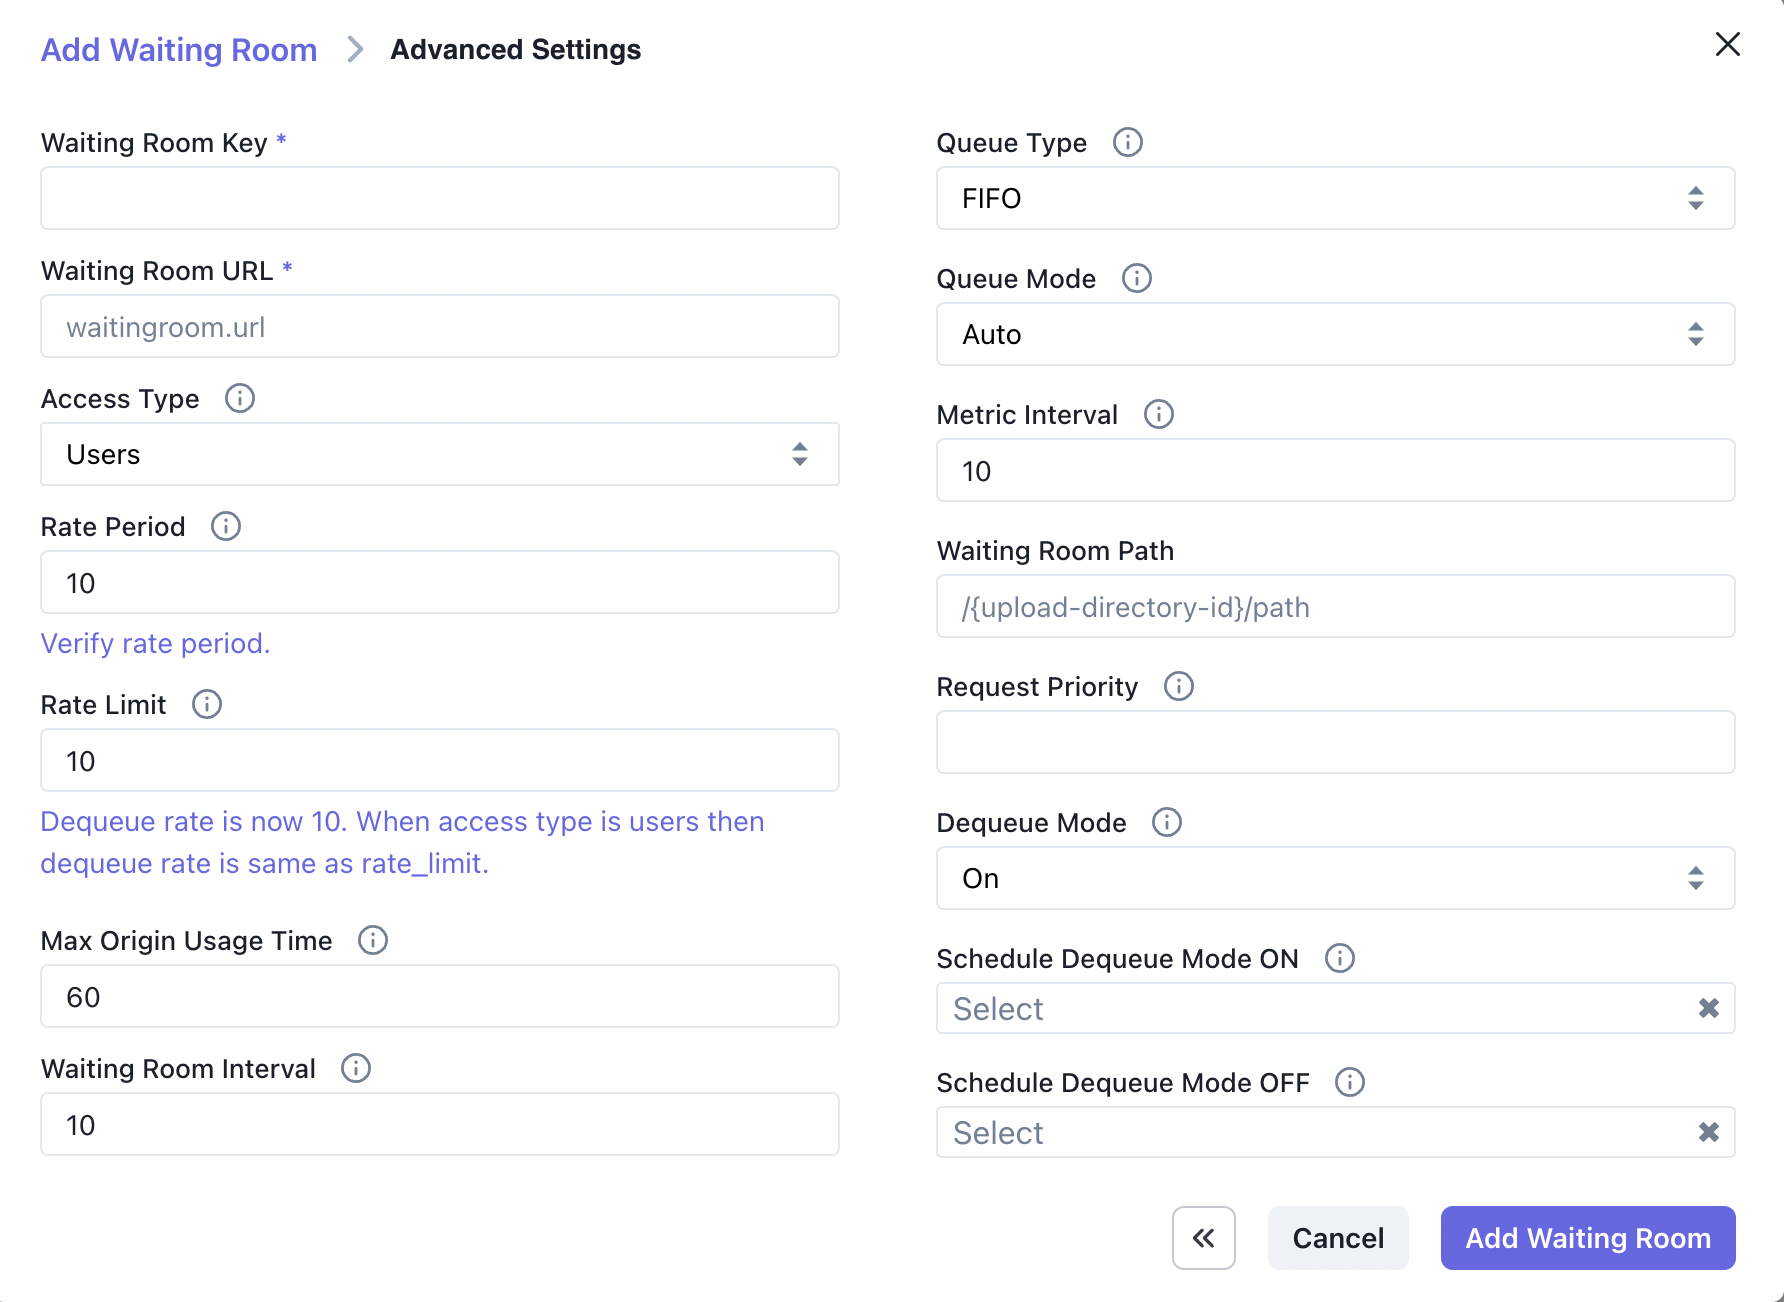
- queue_type: Defines how requests should be removed from the waiting room. The default queue is FIFO(First In, First Out).
- queue_mode: You can configure the waiting room to be enabled dynamically. When set to auto, the waiting room is enabled after reaching the defined rate_limit for a specific
metric_interval. If set to manual, then the waiting room is always enabled. - dequeue_mode: When the value is on, users in the waiting room are granted access to the origin at a rate given by
rate_limit. When the value is off, users remain in the waiting room indefinitely. - metric_interval: The time (in seconds) to enable and disable the waiting room. It represents how long the traffic must be at or above the rate limit before being directed to the waiting room.
- waiting_room_path: The cloud origin (such as NetStorage) path that stores the HTML for the waiting room. The path should be a fully qualified path like
/{upload-directory-id}/path. - request_priority: An array of priorities, where the highest priority corresponds to the lowest number.
- Click Add Waiting Room
Our waiting room is now available.
Monitoring your Virtual Waiting Room
PhotonIQ allows you to view and manage your virtual waiting rooms via its GUI dashboard or the VWRs metrics API.
For monitoring the activity of your virtual waiting rooms using the dashboard:
- Go to Activity on your VWRs dashboard.
- Select the name of the waiting room and time duration for which you intend to monitor activity.
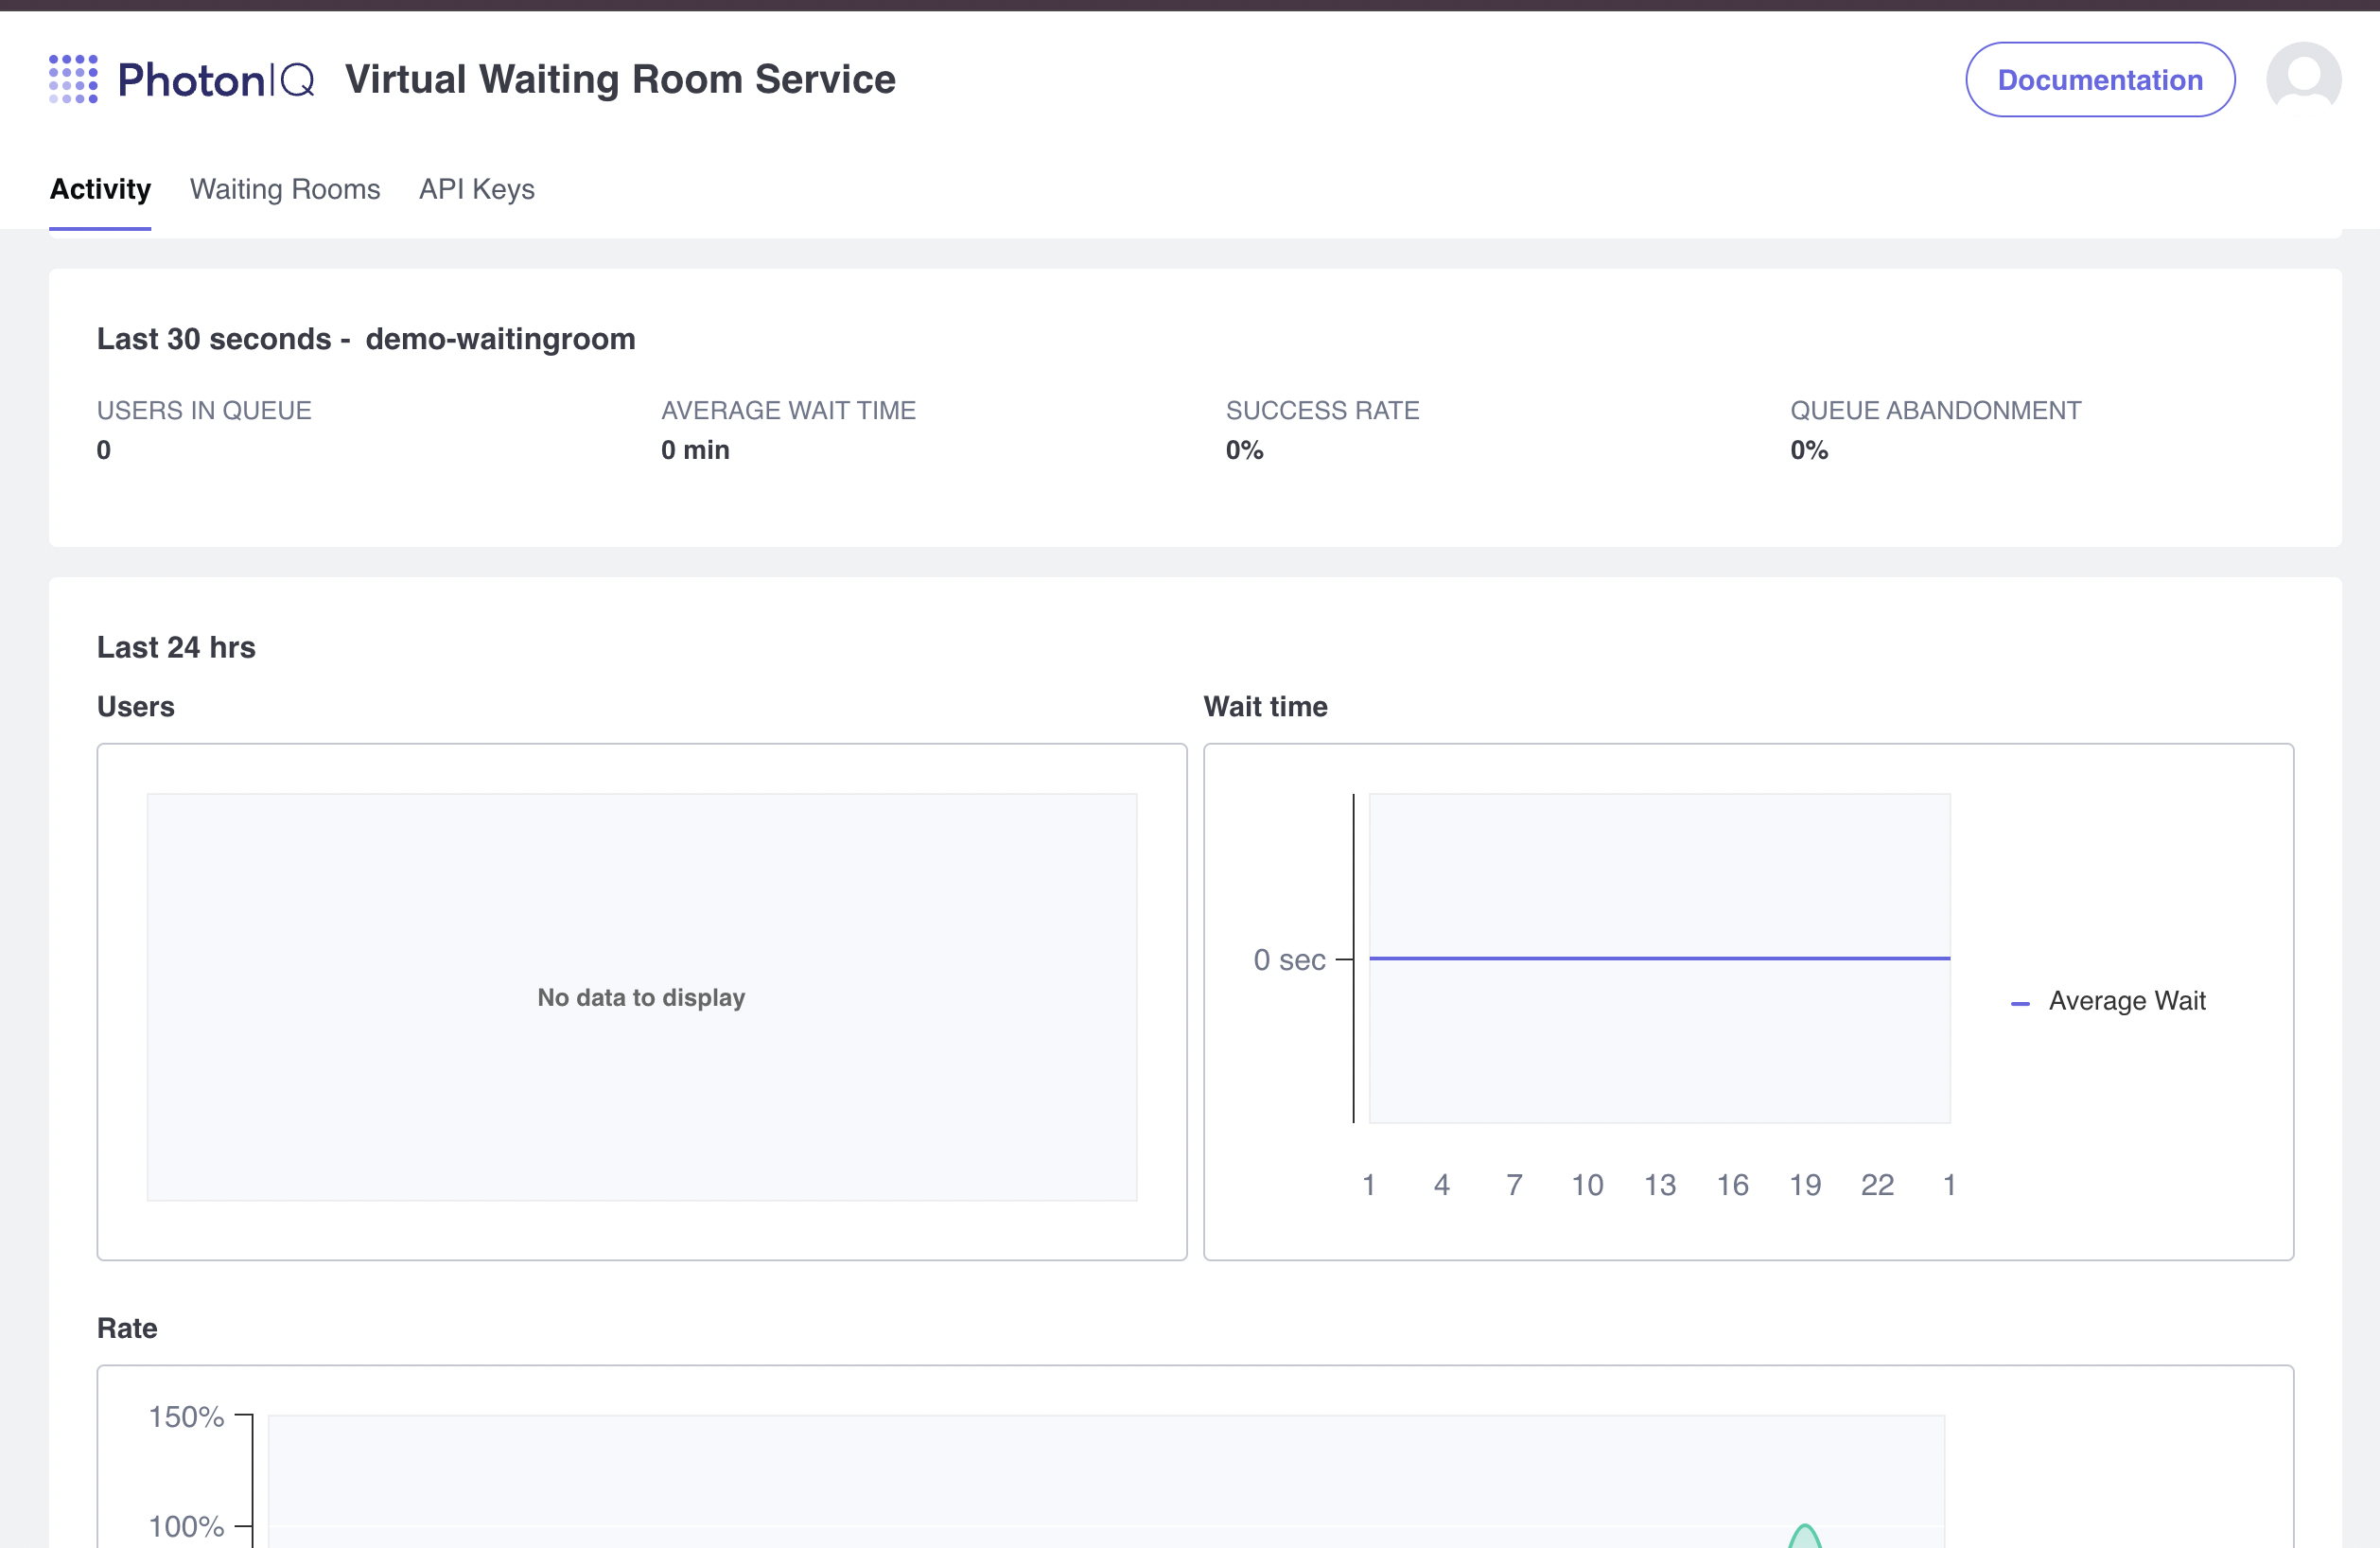
The activity tab allows you to view metrics like:
- Users in Queue
- Average Wait Time
- Success Rate
- Queue Abandonment
By observing these metrics, you can test changes to your waiting room to see how it affects the metrics. For example, customizing your virtual waiting room to observe how it affects queue abandonment.